Bow Decorating Tutorial
Learn how to make a bow-tiful cookie! Make these in all colors of the rainbow, folks will knot be able to resist them!
- Print recipe
- Share on Twitter
- Share on Facebook
- Share on Pinterest

-
1
Bake and cool cookies fully before decorating. Prepare royal icing in the following colors and consistencies. Learn more about royal icing consistencies here.:
Outline/Piping Consistency:
Light Pink (add a drop of Bright White food coloring to your Bubblegum Pink royal icing until you achieve a soft pink color)Flood Consistency:
Light Pink (add a drop of Bright White food coloring to your Bubblegum Pink royal icing until you achieve a soft pink color)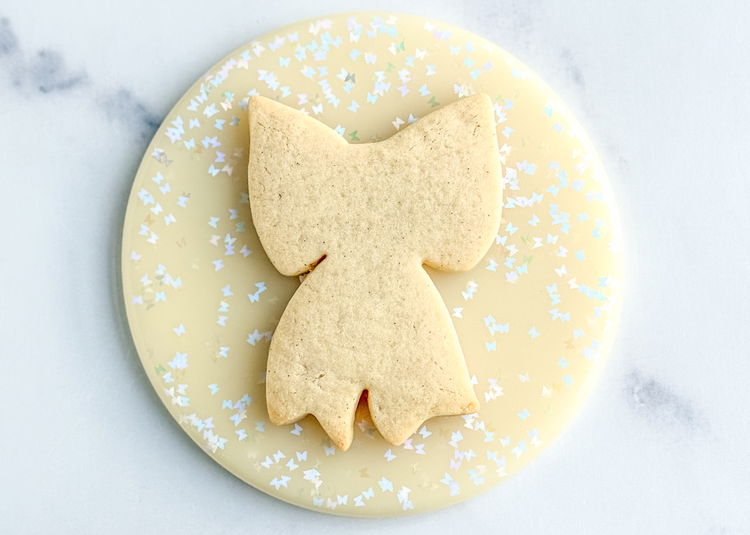
-
2
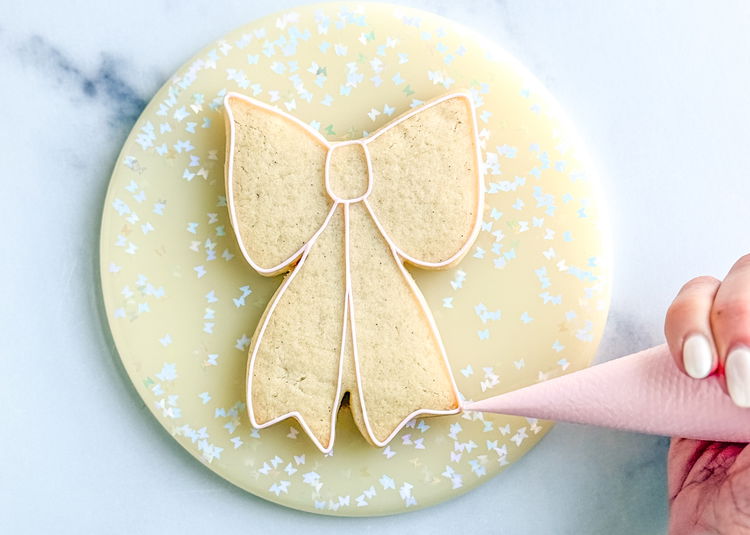
Using the light pink outline consistency icing, outline the shape of the bow, as shown in the photo.
-
3
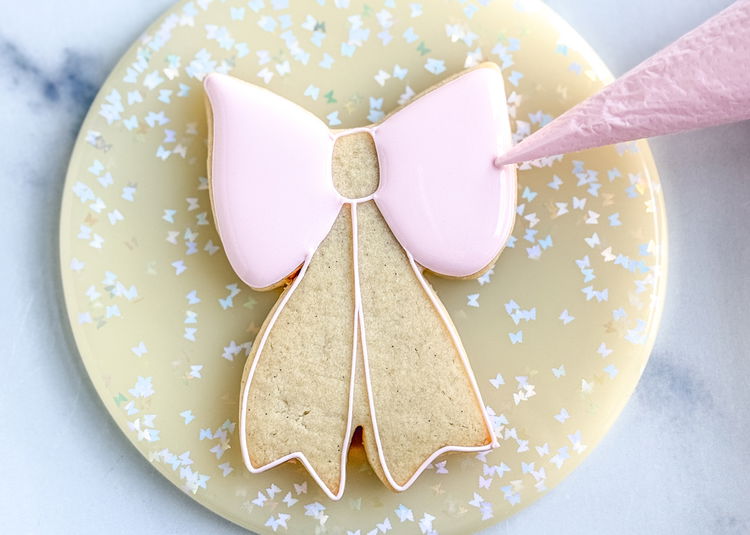
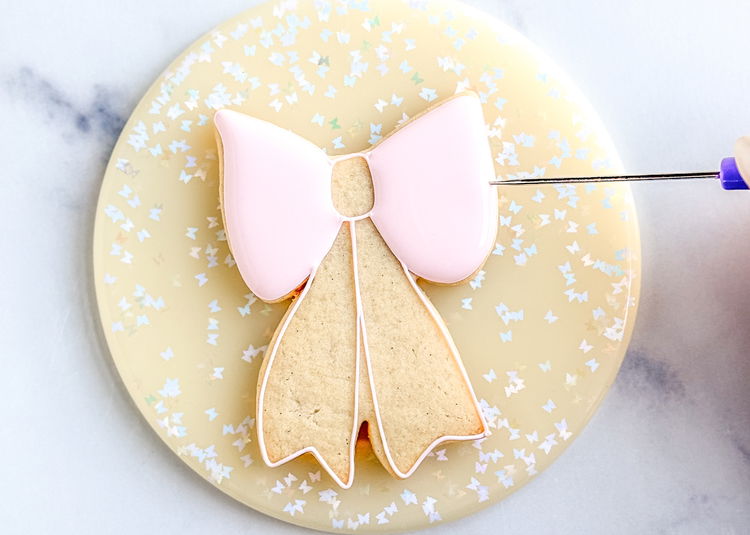
Fill in the top right and left sections of the bow with the light pink flood consistency icing, leaving the middle and bottom sections empty for now. Use your scribe tool or a toothpick to smooth out the icing and pop any air bubbles that come up. Allow this section to dry for 20-30 minutes before moving onto the next step.
Pro Tip: Allowing the different flooded sections of the bow to dry until crusted over ensures that you achieve good definition between the different parts of your bow. If you flood two adjacent sections while the icing is still wet, the sections could run, losing definition.
-
4
-
5
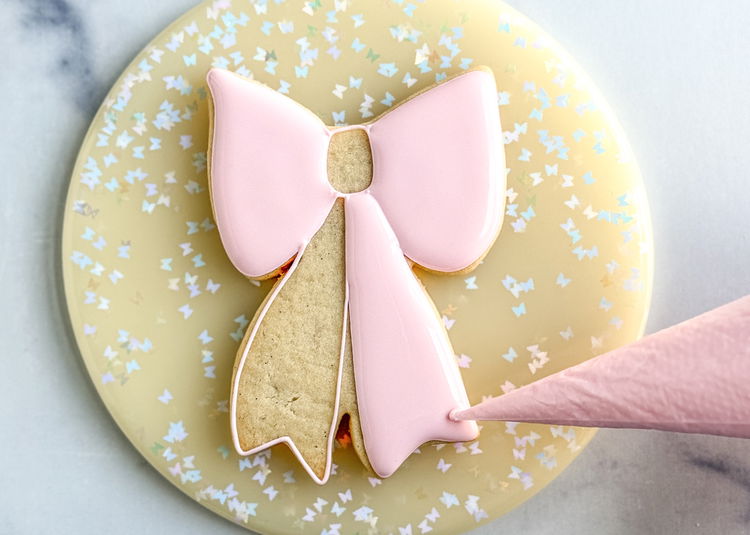
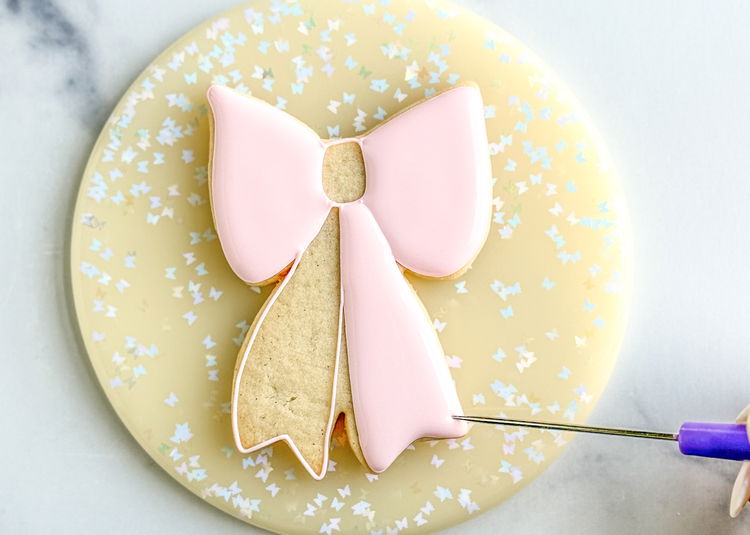
Using the light pink flood icing, fill in the bottom right section of the bow. Use your scribe tool or a toothpick to smooth out the icing and pop any air bubbles that come up.
Allow this section to dry for 20-30 minutes before moving onto the next step.
-
6
-
7
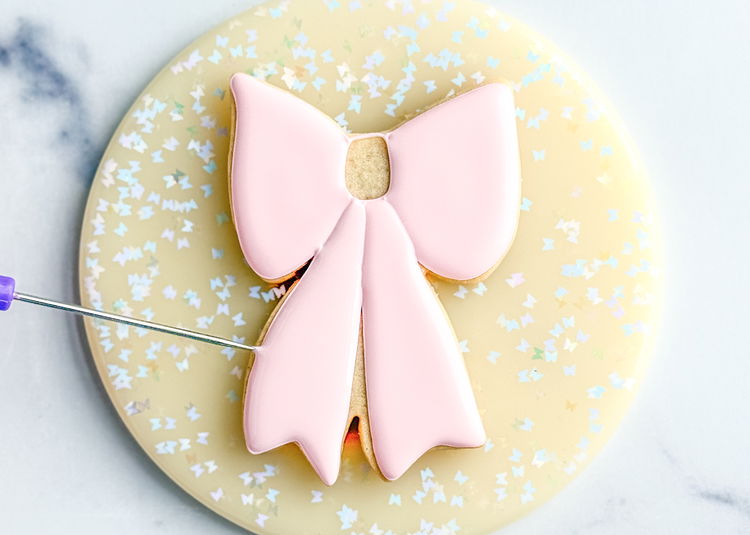
Using the light pink flood icing, fill in the bottom left section of the bow. Use your scribe tool or a toothpick to smooth out the icing and pop any air bubbles that come up. Allow this section to dry for 20-30 minutes before moving onto the next step.
-
8
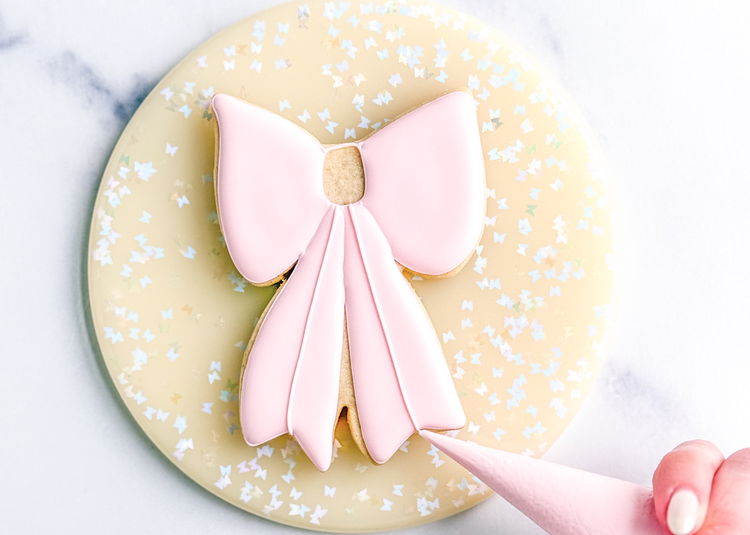
Using the light pink outline consistency icing, pipe the details onto the sections of the bow you’ve flooded, as shown in the photo.
First, pipe lines down the center of the lower ribbons.
Next, pipe curved lines in the tied section of the bow to give it more depth and shape.Pro Tip: You may find you need to practice this on a piece of paper towel before you attempt this design on the actual cookie. Make sure you’re comfortable with the size of the hole in your piping bag, as well as the consistency of your icing. Your icing should be a consistency similar to toothpaste. If it is difficult to control, it may be too thin. Add powdered sugar, a little bit at a time, to achieve the proper consistency. If your icing is difficult to push out of the bag, it may be too thick (add water a little bit at a time to thin out), or widen the hole in your piping bag a little bit at a time.
-
9
-
10
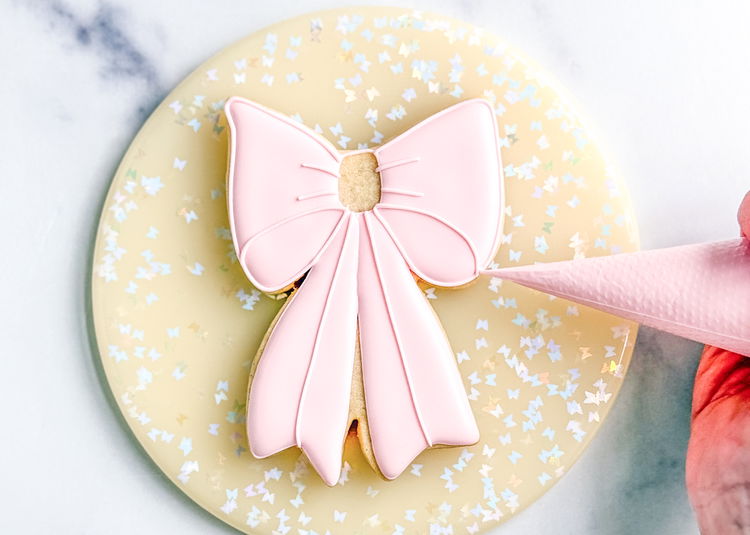
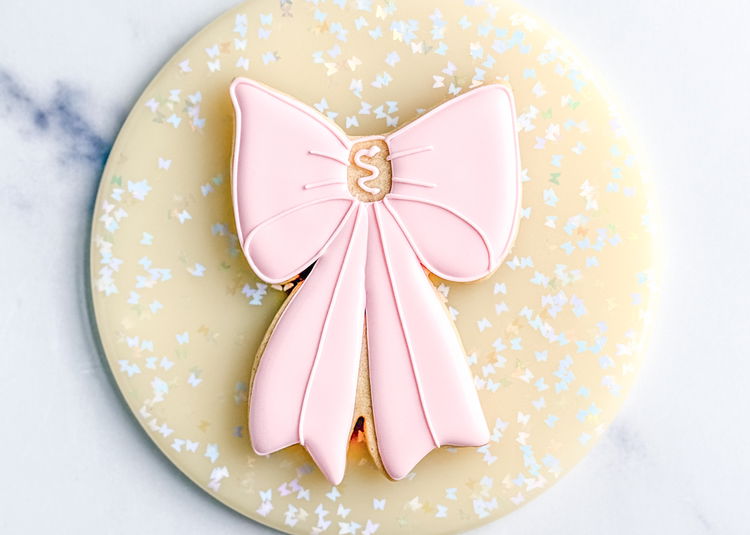
Pipe a squiggle of the light pink outline consistency icing in the middle of the empty section. This will prevent cratering in the icing as it dries, which is common when adding icing to small areas of a cookie. Allow this to dry for 1-2 minutes.
-
11
Fill in this middle section with the light pink outline consistency icing. Smooth out the icing with your scribe tool or toothpick.

Enjoy!
Cookies decorated by Laura Luk of Butterfly Bakes Atlanta.


