Cherries Decorating Tutorial
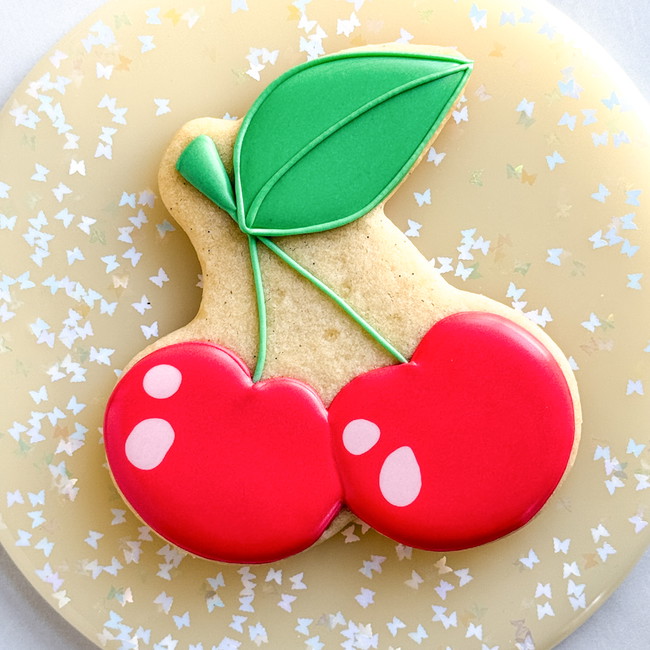
Show your sweet that they’re the cherry on top with this cherry cute cookie decorating tutorial.
- Print recipe
- Share on Twitter
- Share on Facebook
- Share on Pinterest
-
1
Bake and cool cookies fully before decorating. Prepare royal icing in the following colors and consistencies. Learn more about royal icing consistencies here.:
Outline/Piping Consistency:
Green
RedFlood Consistency:
Green
Red
Light Pink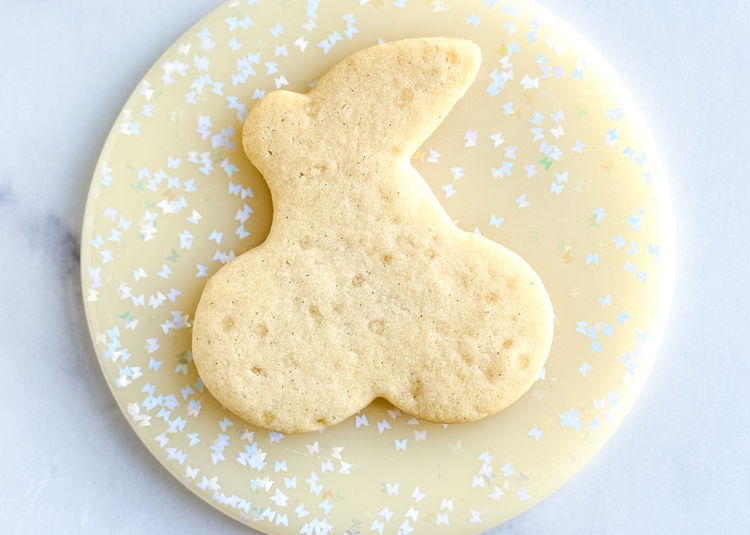
-
2
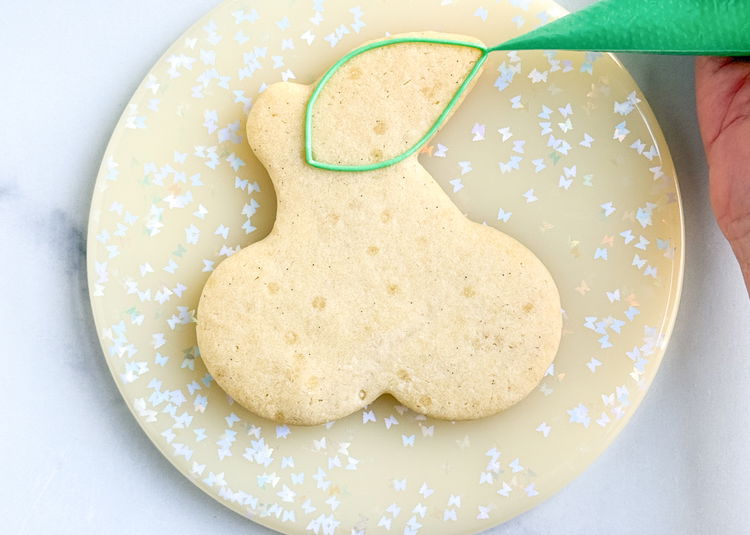
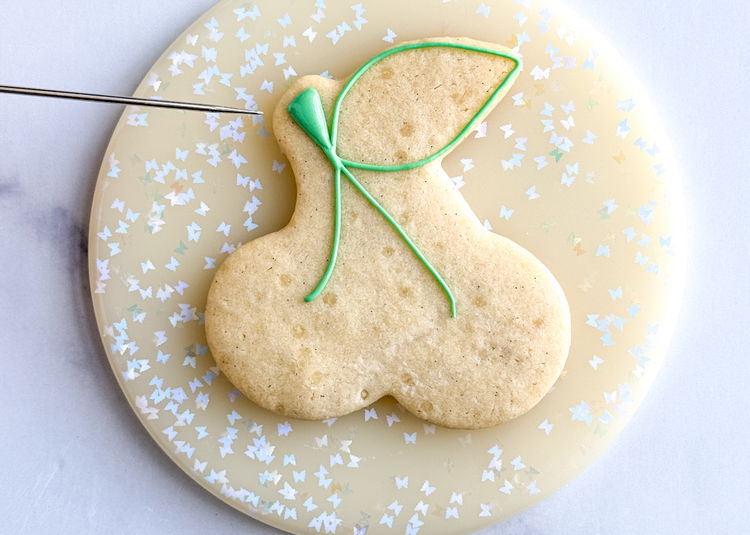
Using the green outline consistency icing, outline the leaf section as shown in the photo.
-
3
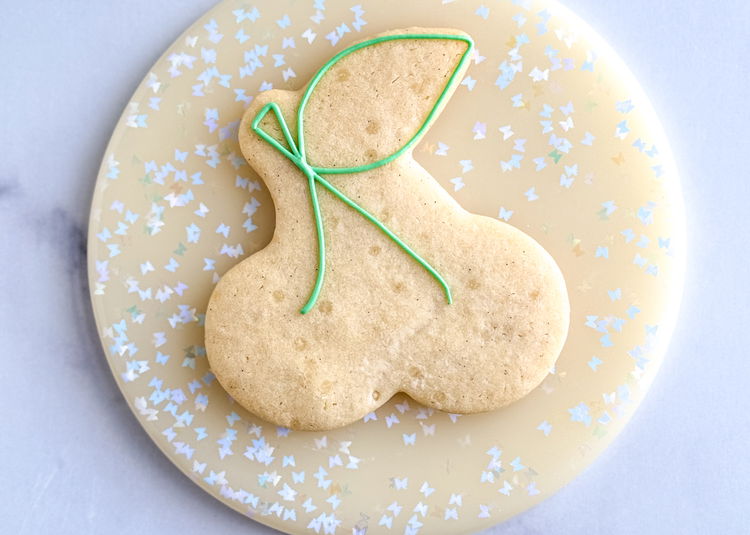
Then, outline the stem section as shown in the photo.
-
4
Fill in the top section of the stem with the same green outline consistency icing, smoothing out the icing with your scribe tool or toothpick.
-
5
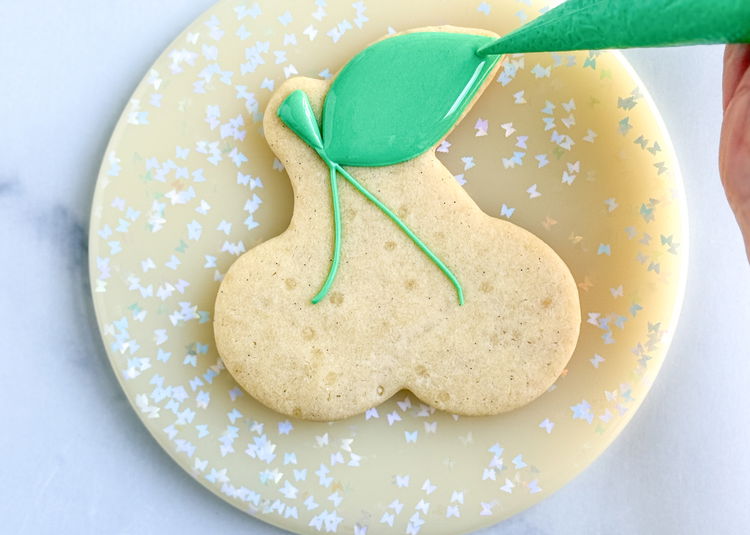
Fill in the shape of the leaf with the light green flood consistency icing.
-
6
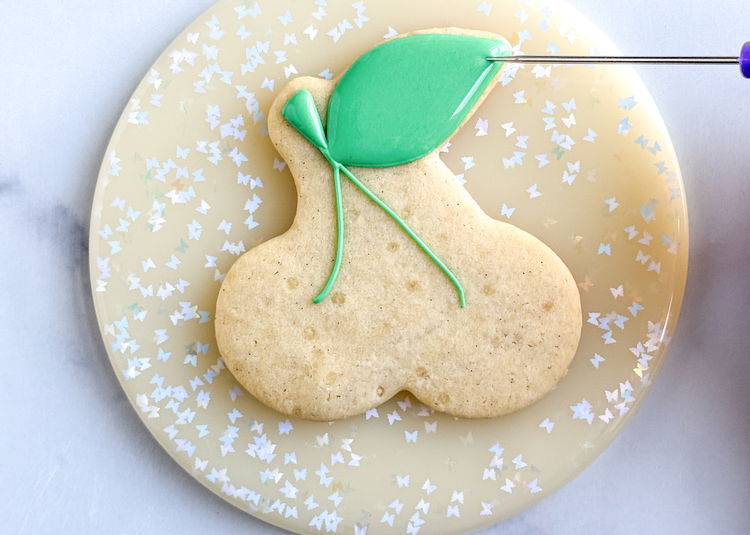
Use your scribe tool or a toothpick to smooth out the icing and pop any air bubbles that come up.
-
7
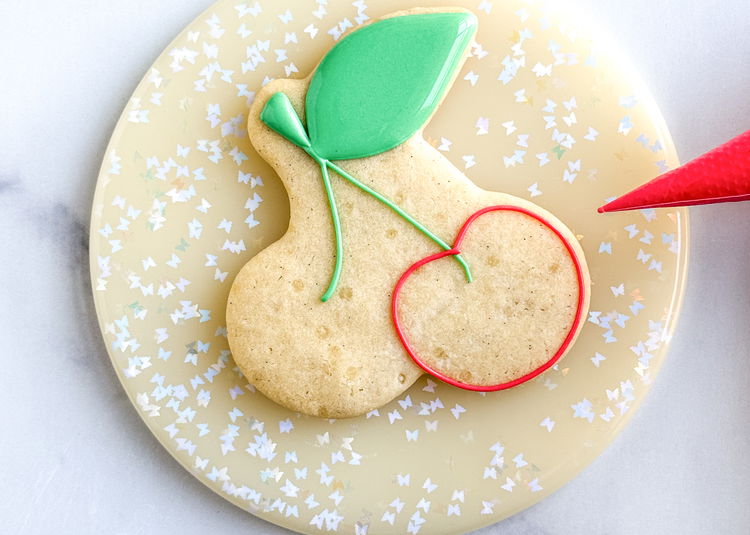
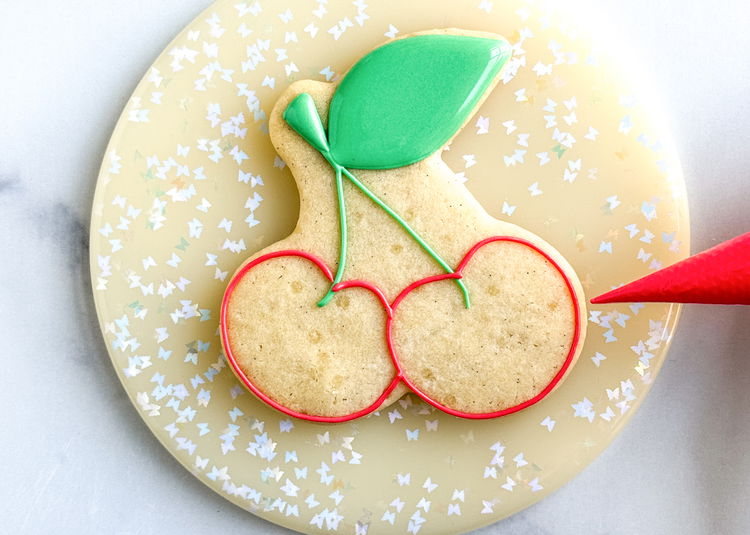
Using the red outline consistency icing, outline the section for the two “side-by-side” cherry sections.
-
8
Use the shape of the cookie as the guide for piping these sections.
-
9
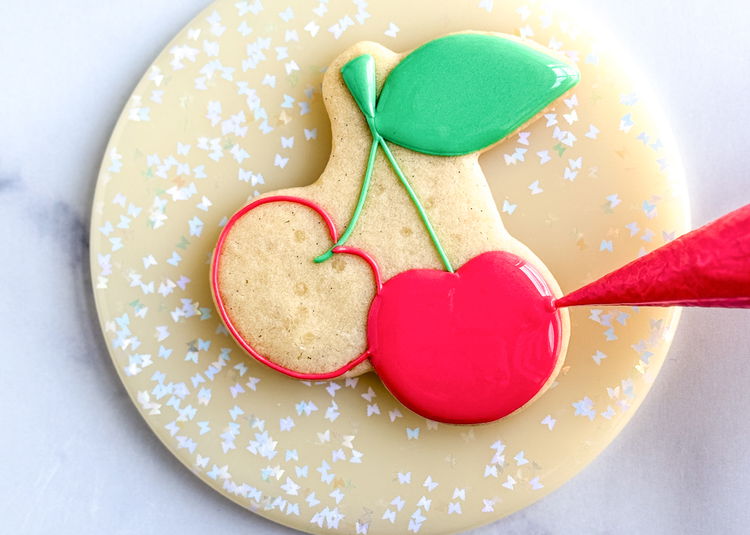
Fill in only one of the cherries with the red flood consistency icing.
-
10
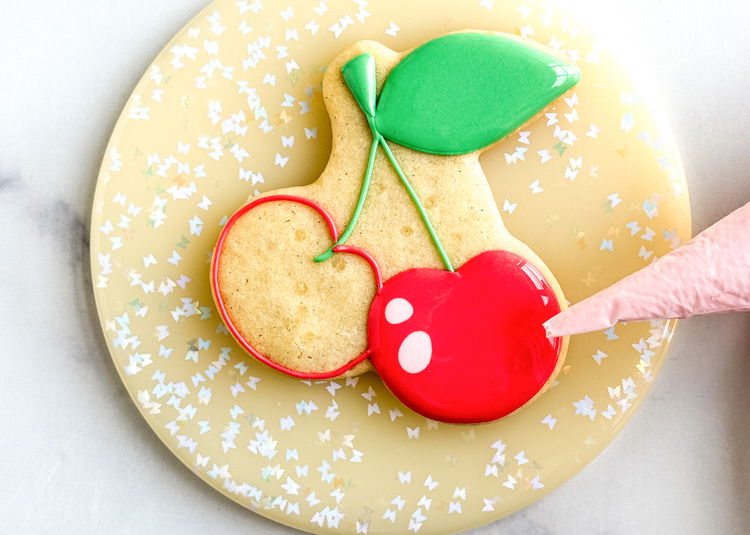
Moving quickly while the icing is still wet, add two dots (one small, and one slightly larger) to the left upper section of the cherry. Allow this section to dry for 20-30 minutes before flooding the other cherry section. Doing so allows up to have definition between the sections.
-
11
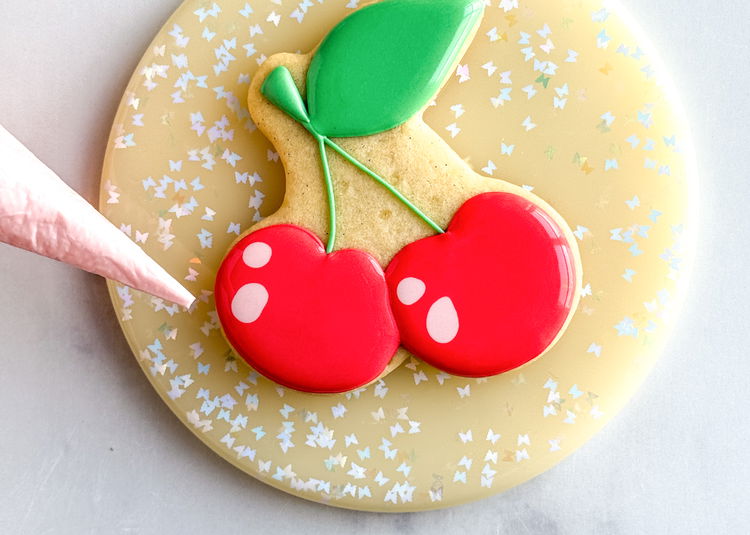
Fill in the other cherry section with the red flood consistency icing.
Moving quickly while the icing is still wet, add two dots (similar to the other cherry) to the left upper section.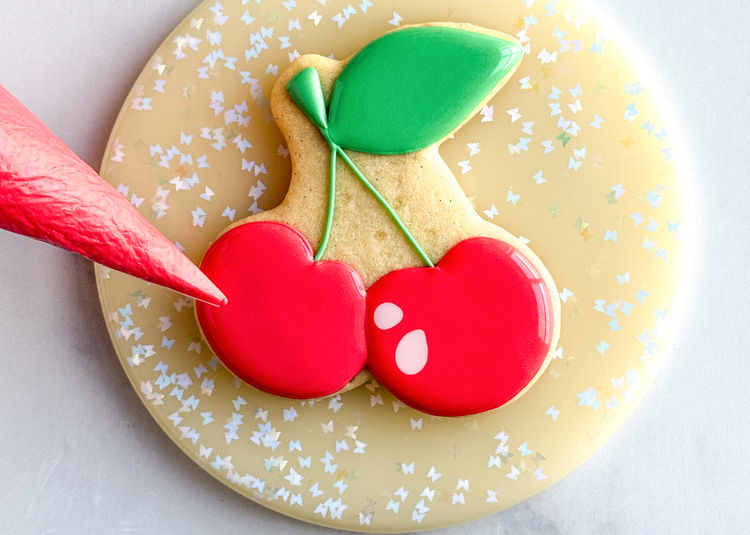
-
12
Moving quickly while the icing is still wet, add two dots (similar to the other cherry) to the left upper section.
-
13
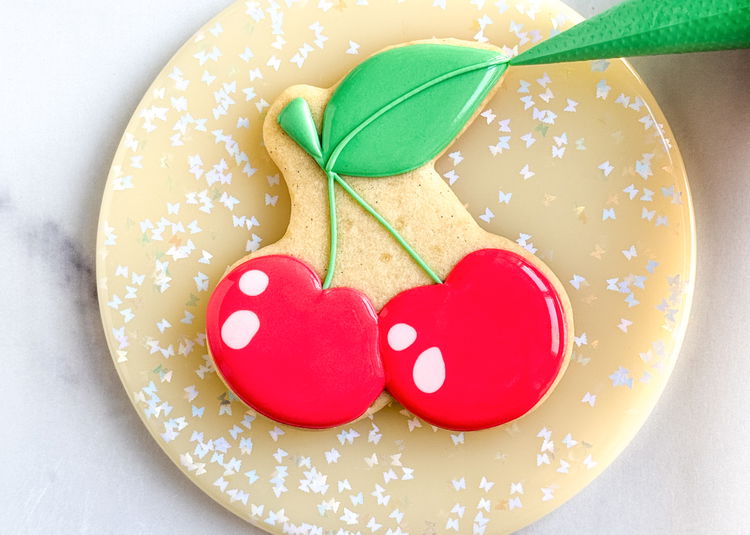
Using the green outline consistency icing, add a line down the middle and outline of the leaf section.
Enjoy!
Cookies decorated by Laura Luk of Butterfly Bakes Atlanta.


