
Easter Nest Decorating Tutorial
This egg-cellent design is beginner-friendly and perfect for Easter! You can make the egg-shaped royal icing transfers up to two weeks in advance for easy assembly the day of.
- Print recipe
- Share on Twitter
- Share on Facebook
- Share on Pinterest
-
3” Round Cookie Cutter
-
Piping Bags
-
Sky Blue Food Coloring
-
Lemon Yellow Food Coloring
-
Mocha Brown Food Coloring
-
Royal Icing
-
Parchment Paper
-
Thingamagenie (or a sharp toothpick)
-
Clean bowl or paint palette
-
Two food-safe paintbrushes
-
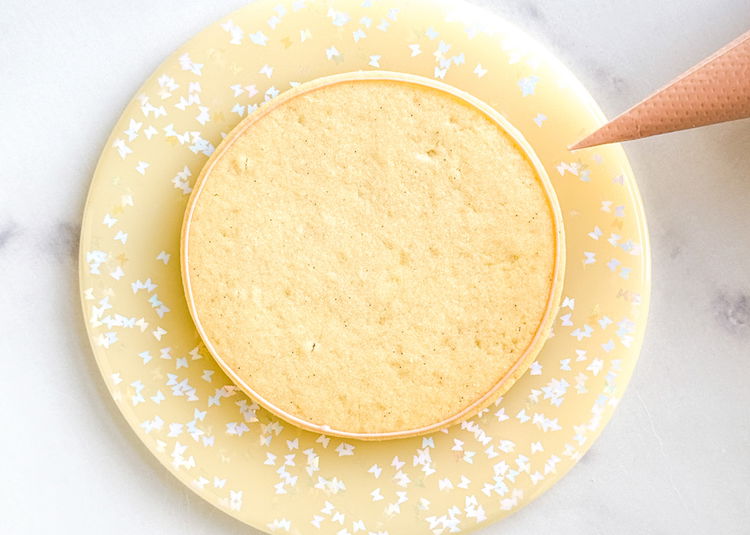
1
Bake and cool cookies fully before decorating. Prepare royal icing in the following colors and consistencies. Also see step 2 to make your royal icing transfer eggs in advance.
Learn more about royal icing consistencies here.:
Outline/Piping Consistency:
Light Blue
Light Yellow
Light BrownFlood Consistency:
Light Brown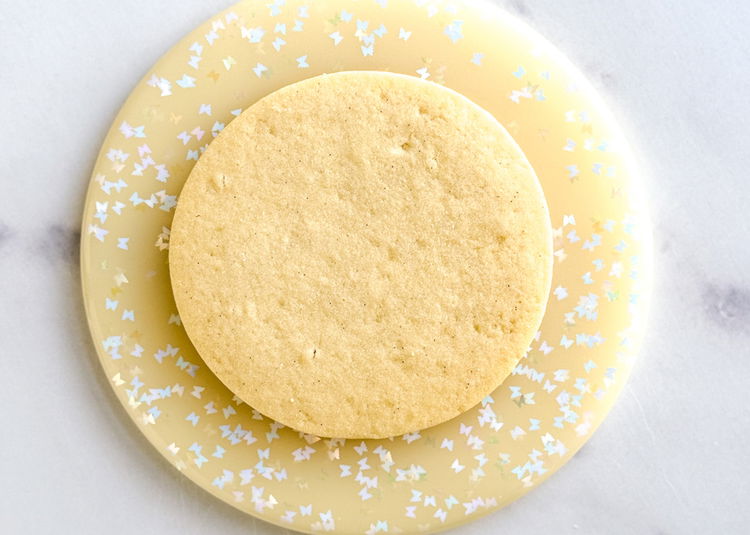
-
2
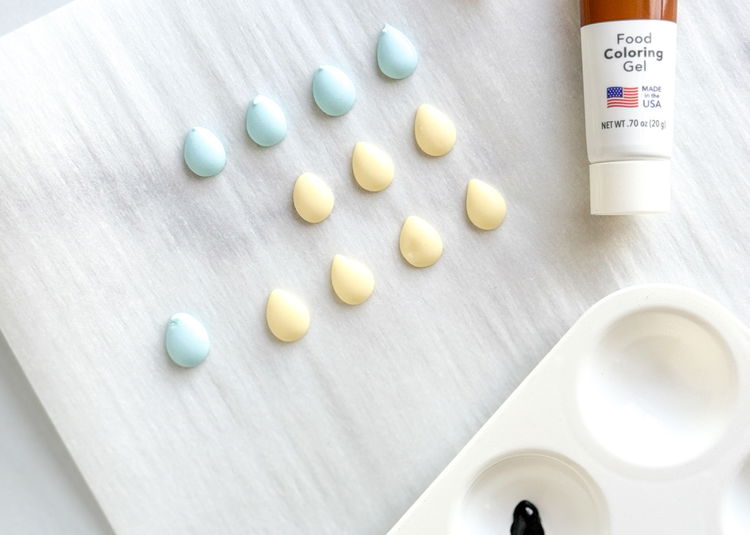
Make your royal icing transfer eggs. These take 6-8 hours to dry, and can be made up to two weeks prior to assembling the cookies. Make sure your parchment paper is laying flat and select a location where the royal icing transfers will be able to lay and dry undisturbed.
Using the light blue and light yellow outline consistency icing, pipe small egg shapes onto the parchment paper. Use your scribe tool or toothpick to gently shape the eggs until desired shape is reached.
Allow the transfers to fully dry for 6-8 hours at room temperature, until the easily slide off the paper. You can save these in a sealed container for up to two weeks.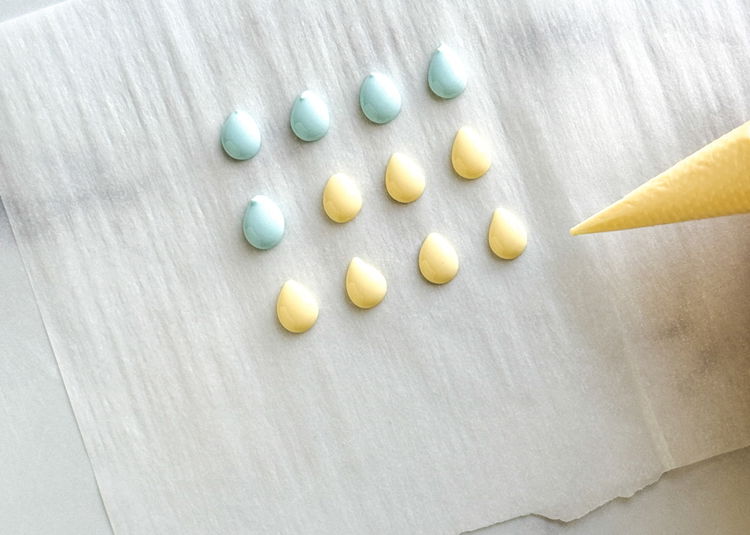
-
3
Outline the circle with the tan outline consistency icing.
-
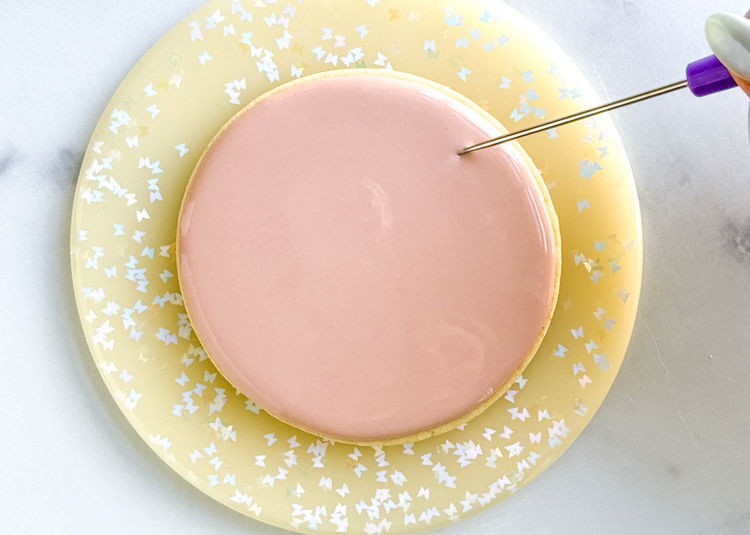
4
Flood the circle with the tan flood consistency icing.
Use your scribe tool or toothpick to pop any air bubbles that may come up. Allow this section to dry for 20-30 minutes until just crusted over.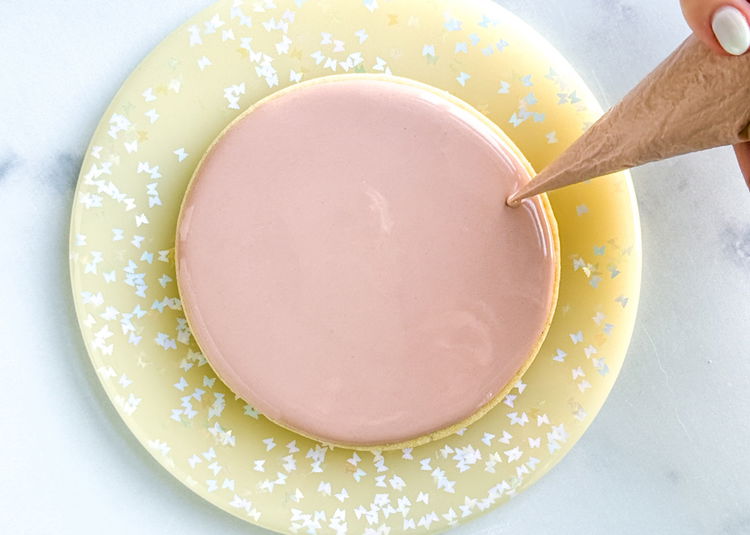
-
5
-
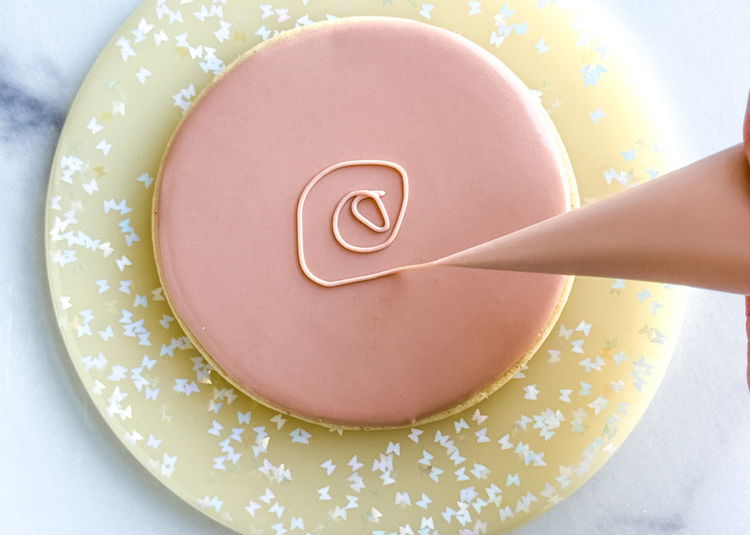
6
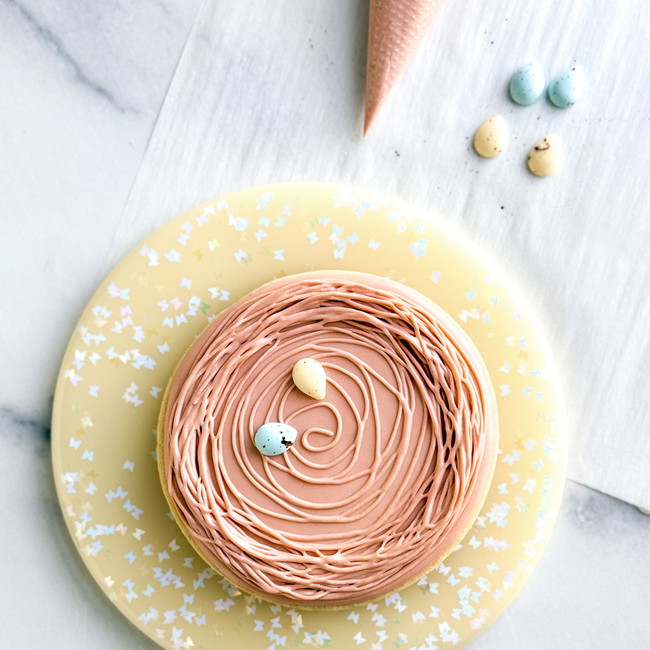
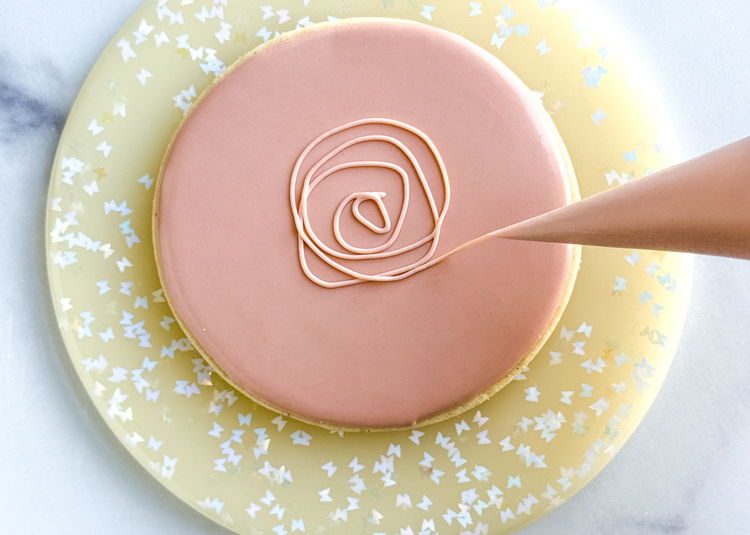
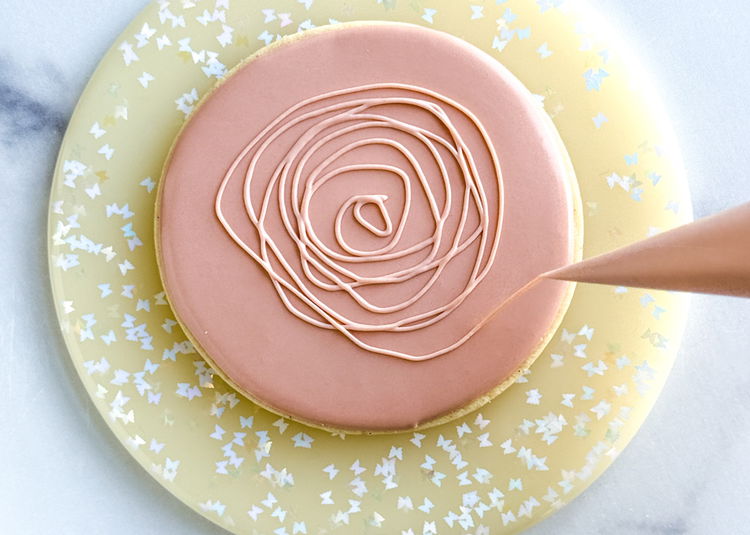
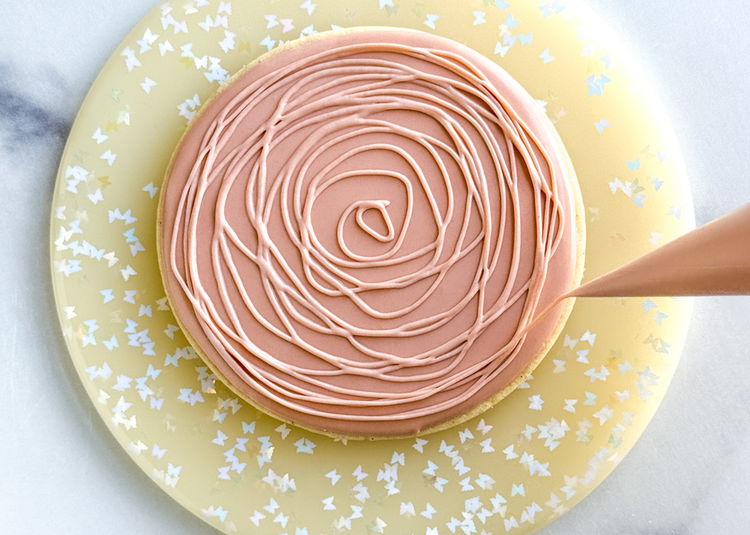
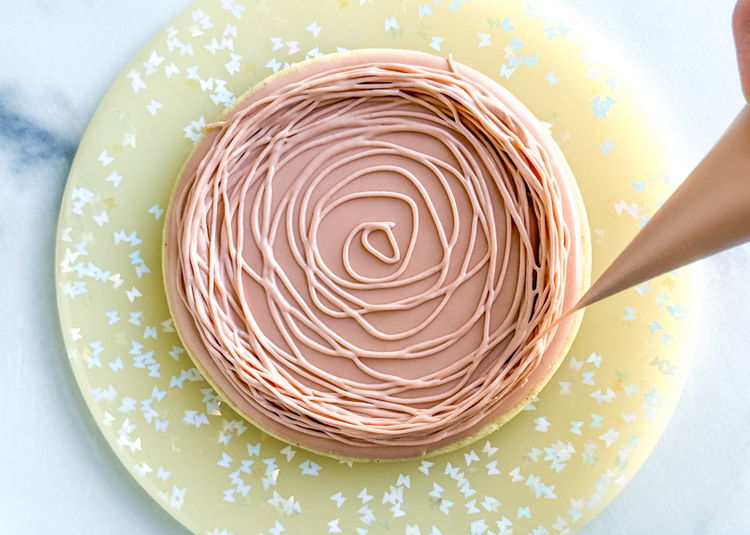
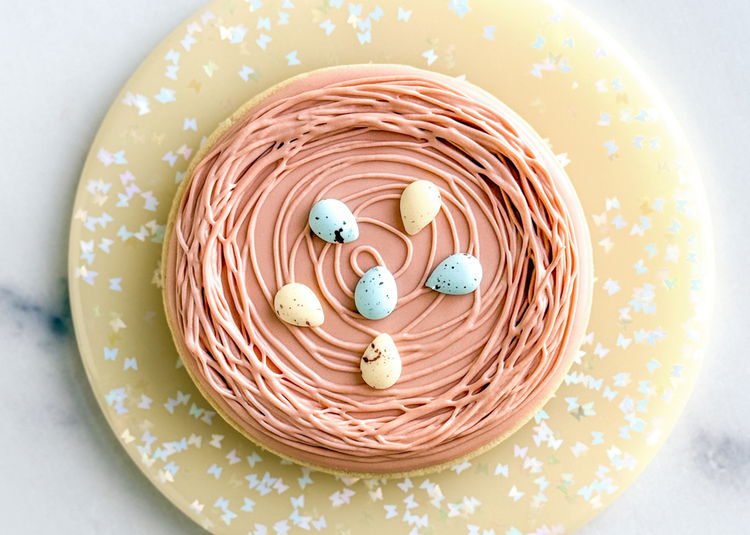
Using the light brown outline consistency icing, start piping the nest onto your circle shape. Starting from the inside of the circle moving out, make uneven concentric circles and continue circling the outer edge, building height around the edge of the cookie shape.
Pro Tip: Ensure your icing consistency is thick enough to achieve this design. If your lines are blurring into each other, you can thicken up your icing with some additional powdered sugar until the desired consistency is achieved.
Allow this icing to dry for at least 1 hour or until firm before adding the royal icing egg transfers.
-
7
-
8
-
9
-
10
-
11
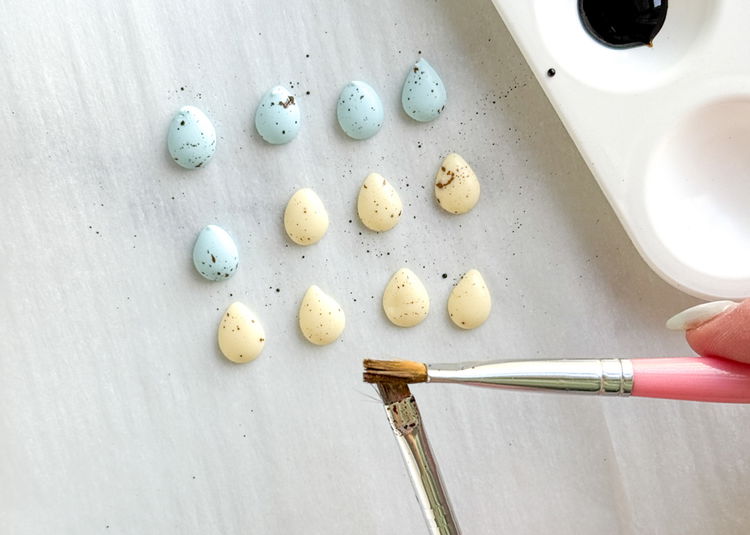
Dilute a small amount of brown gel food color with water into a clean paint palette or small bowl. Dip one paint brush into the diluted gel food color. Using your second, clean paint brush, carefully flick the bristles over the transfers, creating a splatter effect onto the eggs. Doing this in close proximity to the eggs is ideal to minimize platter outside of the parchment paper that the eggs are sitting on.
-
12
-
13
Once the transfers are completely dry and easily slide off the parchment paper, carefully pick them up and add a small dot of light brown outline consistency icing onto the back of the transfer.
Carefully place each egg around the center of the cookie, pressing gently to secure them in place.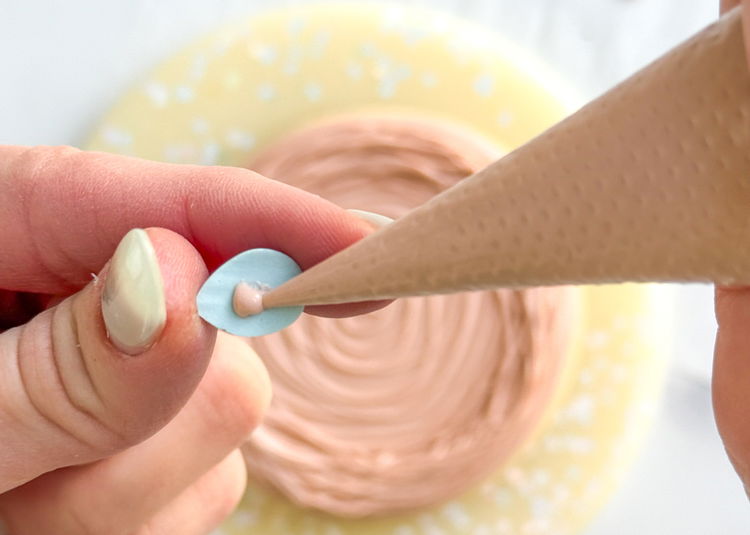
-
14
-
15
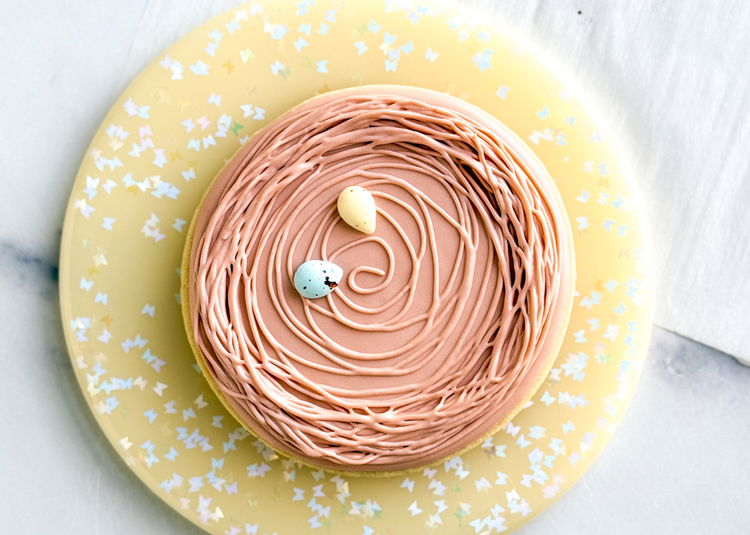
Enjoy!
Cookies decorated by Laura Luk of Butterfly Bakes Atlanta.
