How to Decorate a Carrot Cookie
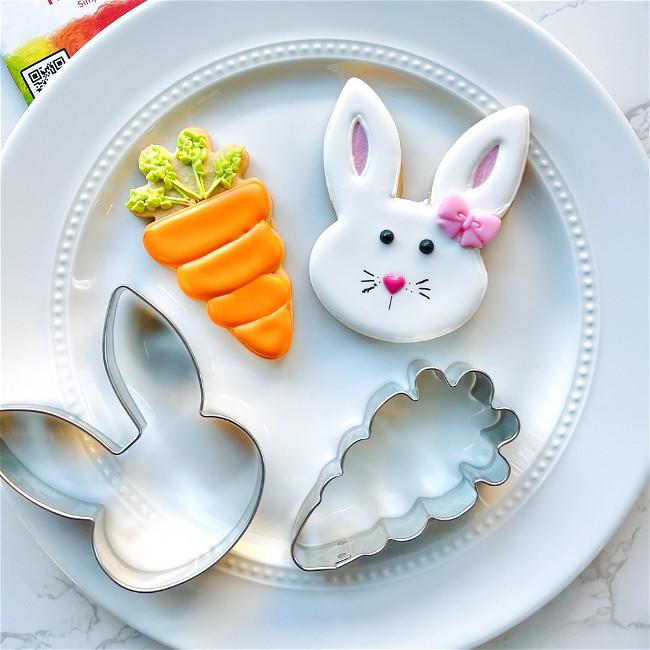
These carrot cookies area great addition to any Easter or bunny-themed set. Learn how to decorate a carrot sugar cookie using beginner-friendly techniques in this tutorial.
- Print recipe
- Share on Twitter
- Share on Facebook
- Share on Pinterest
-
1
Bake and cool cookies fully before decorating. Prepare royal icing in the following colors and consistencies:
Outline/Piping Consistency:
Orange
GreenFlood Consistency:
Orange -
2
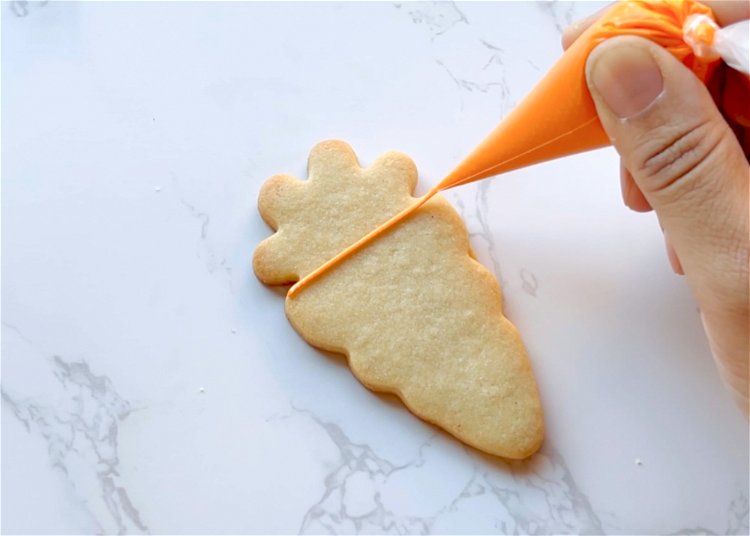
Outline the carrot shape, except for the top, with orange outline consistency icing.
-
3
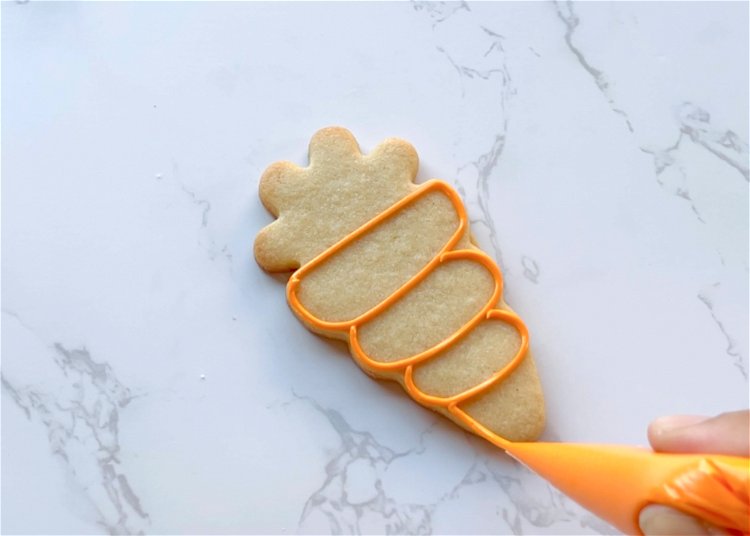
Using the shape of the carrot cookie cutter as a guide, outline the 4 sections of the carrot with orange outline consistency icing.
-
4
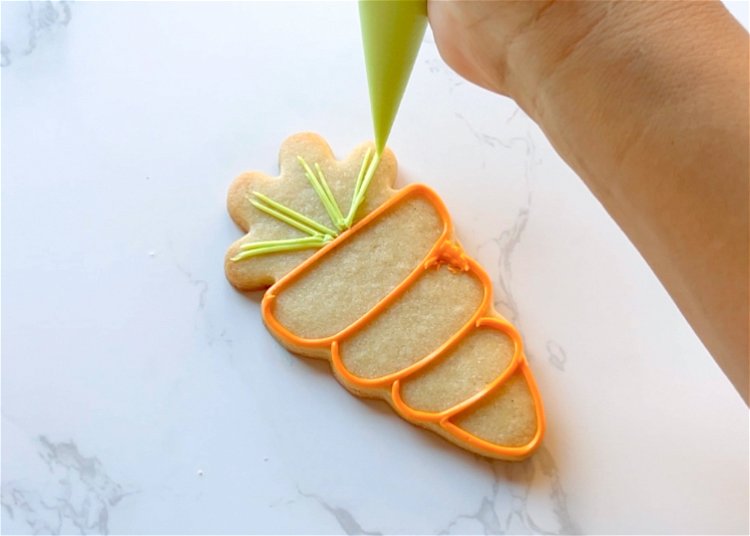
Use your green outline consistency icing to pipe small stems at the top of the carrot.
-
5
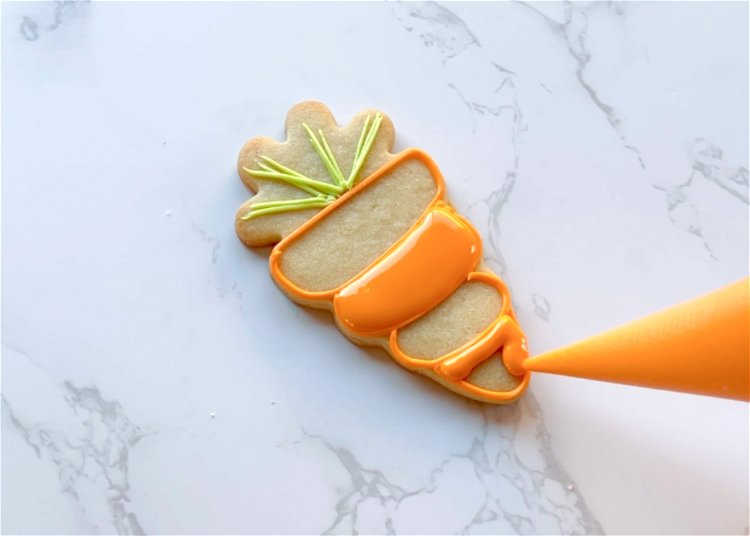
Using orange flood consistency icing, fill in the bottom section of the carrot and the middle section. Be sure to flood adjacent sections at different times, and you want the icing to dry slightly before flooding adjacent sections. This prevents the two sections from bleeding into each other.
-
6
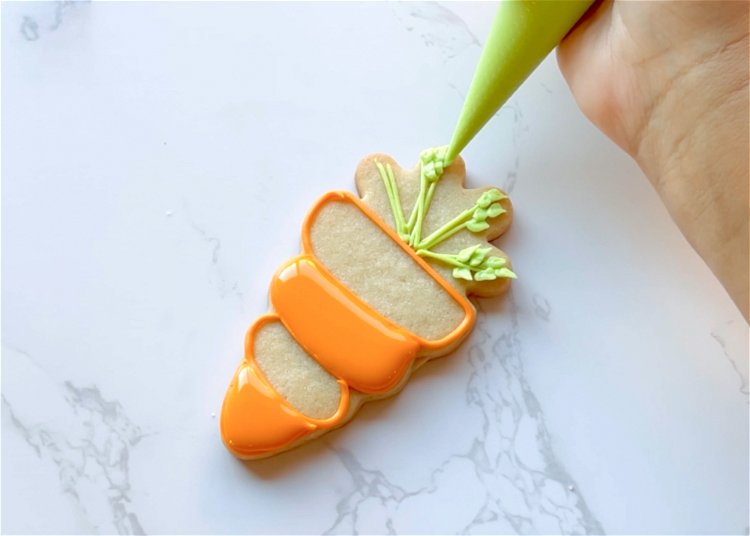
While the two flooded sections are drying, pipe the leaves of the carrot with green outline consistency icing.
To create the leaf shape, hold your piping bag and flatten the tip as much as possible. Snip a tiny amount off of each side of the bag to create a small “V” shape. Practice your piping on a paper towel or piece of parchment paper to perfect the shape, applying more or less pressure and adjusting as needed.
-
7
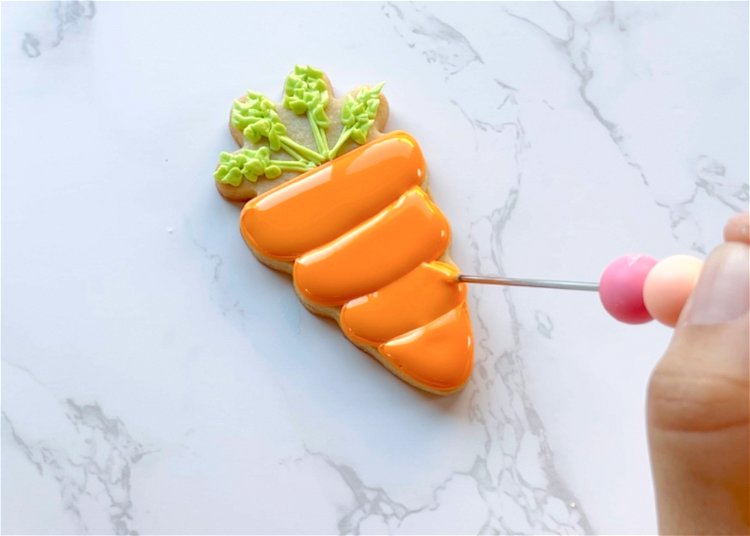
Fill in the remaining two sections of carrot with orange flood consistency icing, and gently move the icing around with a scribe tool or toothpick to pop any air bubbles and to ensure full coverage.
-
8
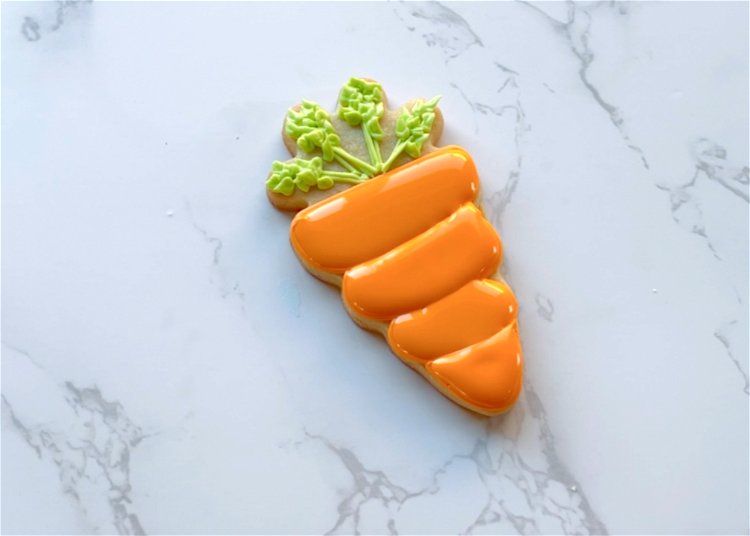
Let the icing dry fully for 12-24 hours before serving.
Recipe Video
Enjoy!
Cookies decorated by Julia of Julia’s Cookies


