How to Decorate a Flip Flop Cookie
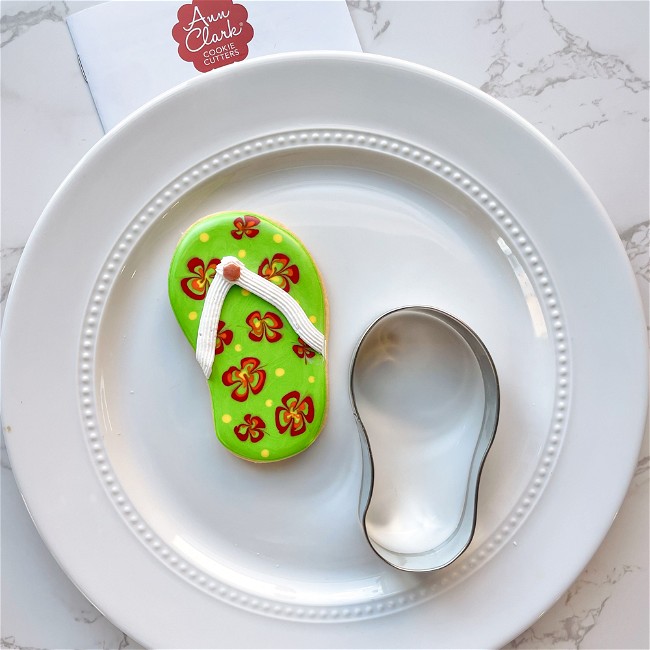
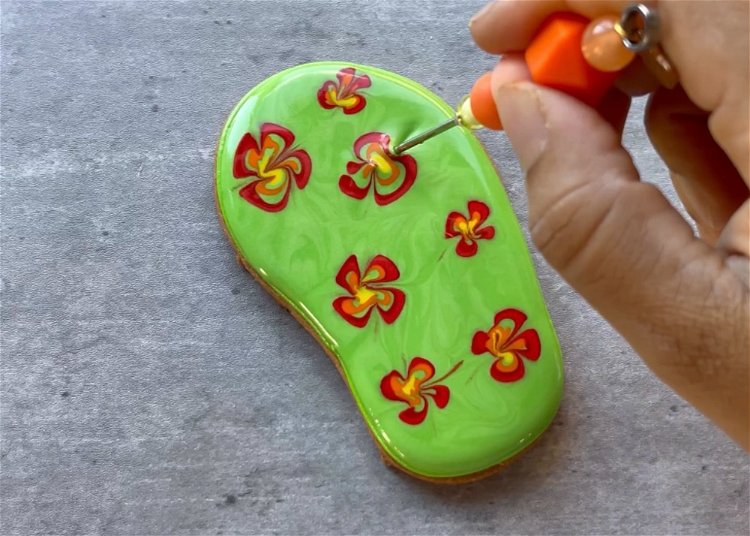
Summer ready! Learn how to decorate our super-popular flip flop sandal shape using a wet-on-wet technique. This technique will allow you to create colorful hibiscus flowers on the base of the sandal.
- Print recipe
- Share on Twitter
- Share on Facebook
- Share on Pinterest
-
1
Bake and cool cookies fully before decorating. Prepare royal icing in the following colors and consistencies:
Thick Flood Consistency:
Green
Red
Orange
YellowOutline Consistency:
White -
2
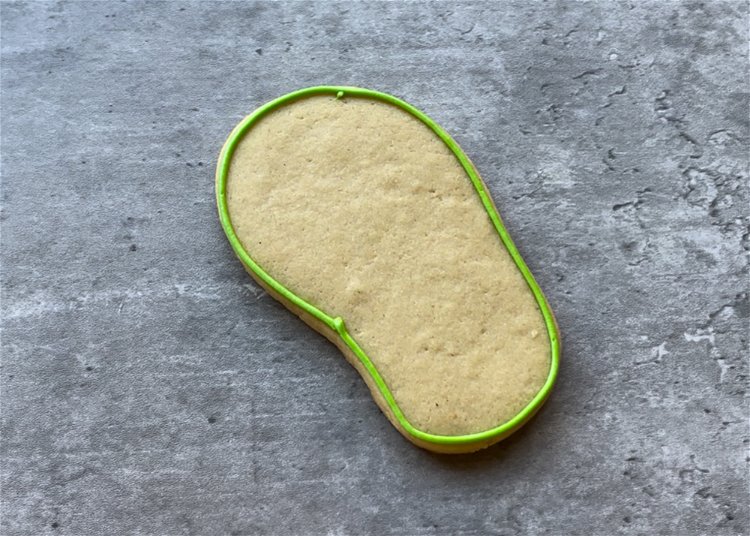
Using your green royal icing, outline the entire shape.
-
3
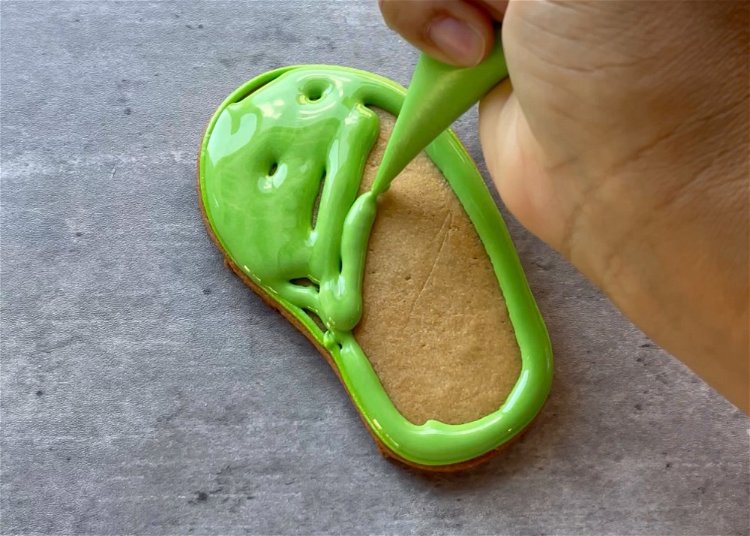
Flood the shape with green royal icing, using a scribe tool or toothpick to move the icing around, ensuring full coverage and popping any air bubbles. Move quickly to the next steps through Step 7, as the icing needs to be wet for this design to work.
-
4
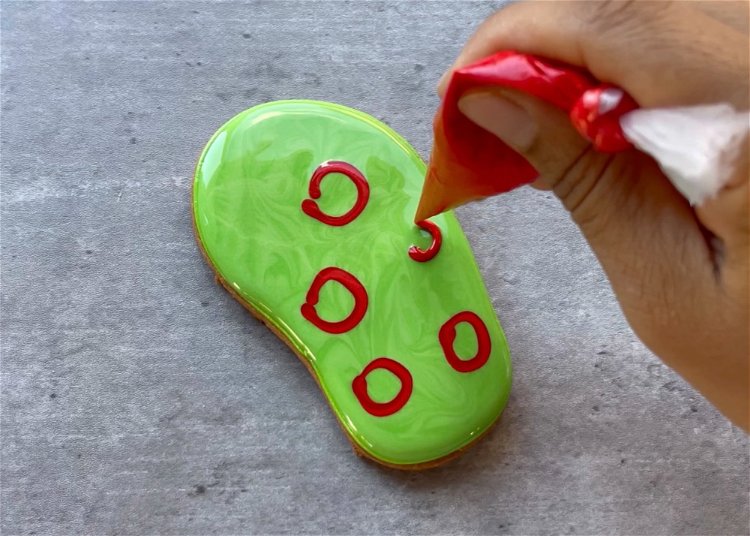
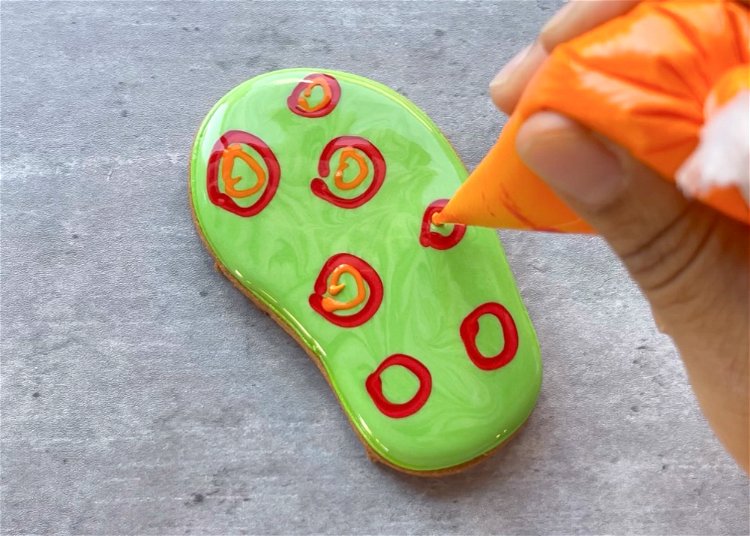
Pipe red circles throughout the shape. Don’t worry about them being perfectly round, they’ll be getting moved around as you create the hibiscus pattern.
-
5
Next, pipe orange circles inside the red circles.
-
6
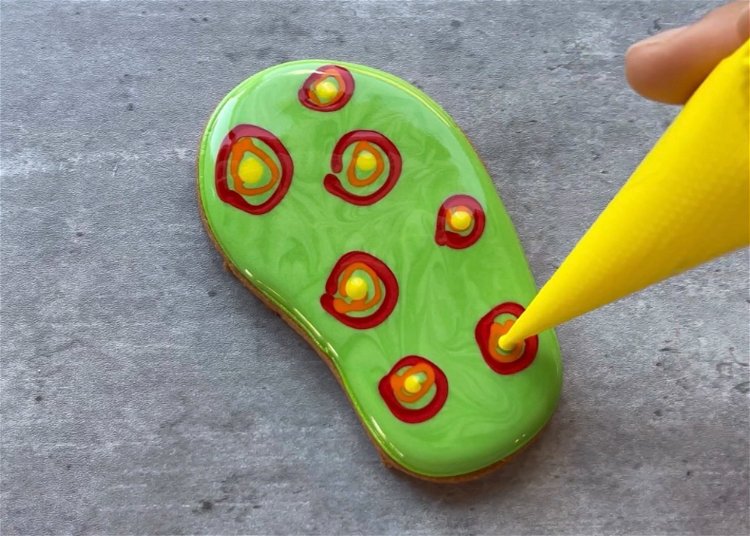
Now pipe yellow dots in the center of the red and orange circles.
-
7
While your icing is still wet, use a scribe tool to pull the concentric circles inward. Each place you pull in will create a division between the petals. We did 4 petal flowers, pulling the icing in at 4 different spots.
-
8
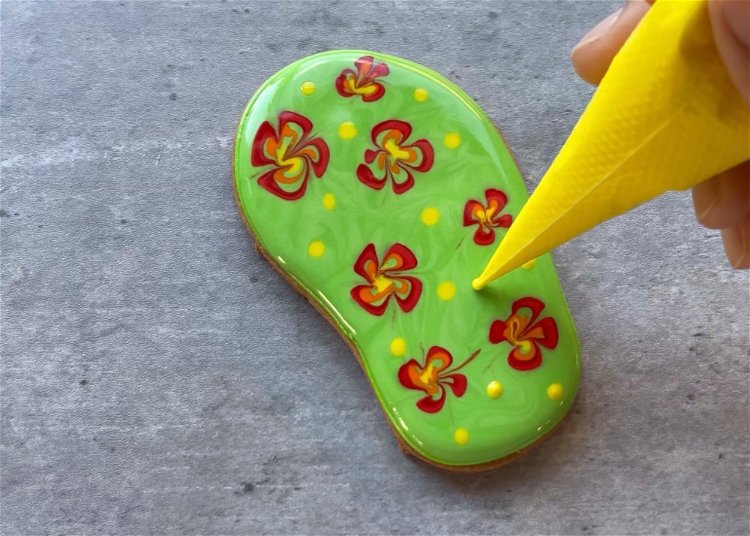
If you feel you’re flip flop needs a bit more color, add yellow dots throughout the base.
-
9
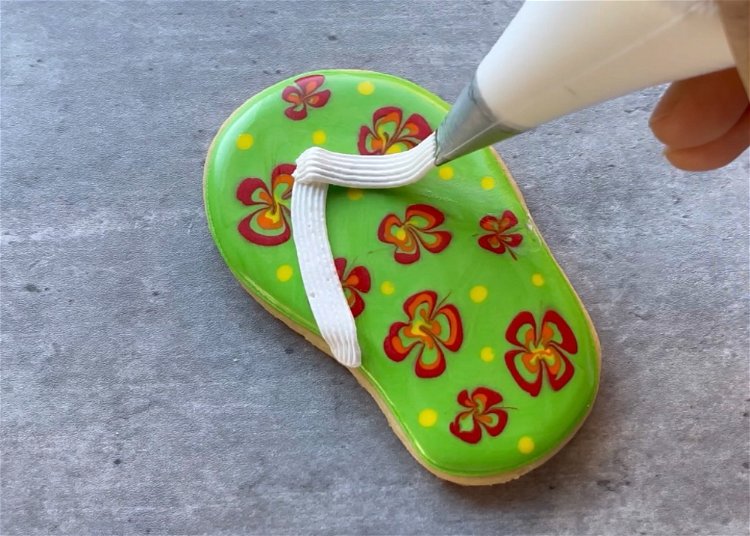
Once the icing has dried to the point of just crusting over, you can pipe the sandal straps. Use a piping bag fitted with a small star tip to get the correct texture. Pipe two lines of white icing that meet in the upper part of the sandal to mimic a flip flop sandal.
-
10
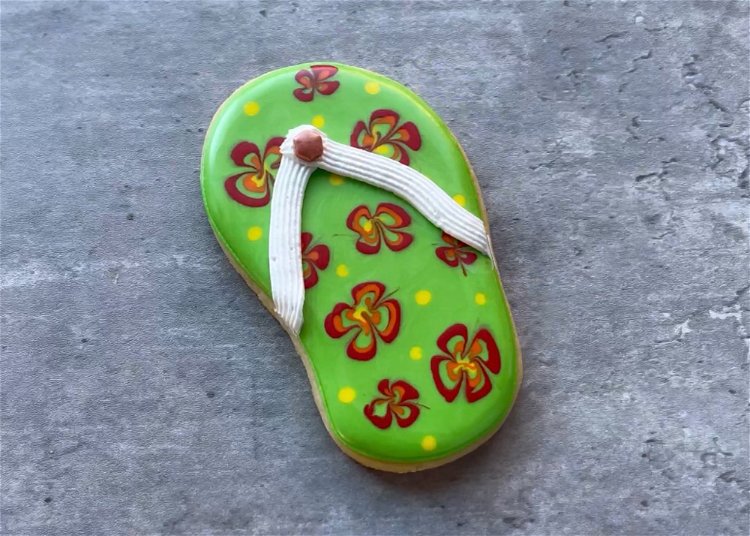
To cover up the seam between your two lines, you can add a decorative sprinkle or dot of colorful royal icing.
Recipe Video
Enjoy!
Cookies decorated by Julia Perugini of Julia’s Cookies


