How to Decorate a Heart Sunglasses Cookie
Embrace your baking era with this heart-shaped sunglasses shape. We heart this shape for summer soirees, bachelorette bashes, and beautiful birthdays. Enjoy this beginner-friendly tutorial on how to decorate this best-seller.
- Print recipe
- Share on Twitter
- Share on Facebook
- Share on Pinterest

-
Heart Sunglasses Cookie Cutter
-
Piping Bags
-
Edible Marker
-
Super Red Food Coloring
-
Super Black Food Coloring
-
Royal Icing
-
1
Bake and cool cookies fully before decorating. Prepare royal icing in the following colors and consistencies:
Thick Flood Consistency:
Black
Pro tip: The black icing will darken with time. To prevent color bleed, where dark colors seep into each other, make your icing a dark grey color. As the icing dries on the cookie, the color will deepen to a deep charcoal color.Outline Consistency:
RedFlood Consistency:
Red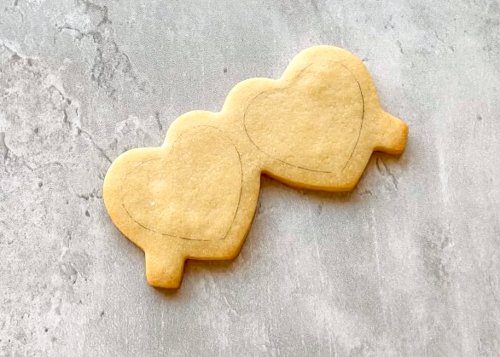
-
2
Using your edible marker or a pencil, outline the interior heart shape. This will provide a guide for you as you pipe the lenses of the sunglasses shape.
-
3
Outline the heart shape you just drew with red outline consistency icing.

-
4
Now, outline the edge of the cookie with red outline consistency icing. This will be the frames of the sunglasses.

-
5
Next, outline the temple/arm part of the sunglasses with red outline consistency icing.

-
6
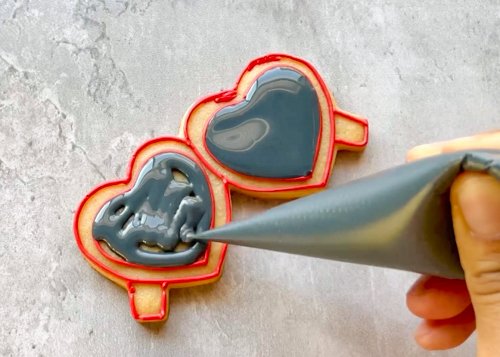
Flood the lenses of the glasses with black thick flood icing. You may need to use a scribe tool or toothpick to gently coax the icing into place, and to ensure that all air bubbles are popped.
-
7
Use your red flood consistency icing to fill in the frames of the sunglasses. Use your scribe tool or toothpick to coax the icing to edges and to pop any air bubbles.
Pro tip: To prevent “cratering” or flood icing collapsing in small areas, it may help to pipe a small squiggle of red outline consistency icing along the interior of the frames before flooding with red icing. The squiggle of outline consistency icing will create structure for your flood icing, making it less susceptible to collapse.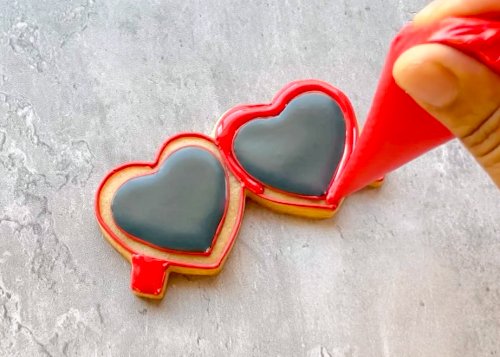
-
8
You can leave the glasses as-is, or outline the frames with red outline consistency icing to create more detail and depth to your design.

-
9

Recipe Video
Enjoy!
Cookies decorated by Julia Perugini of Julia’s Cookies


