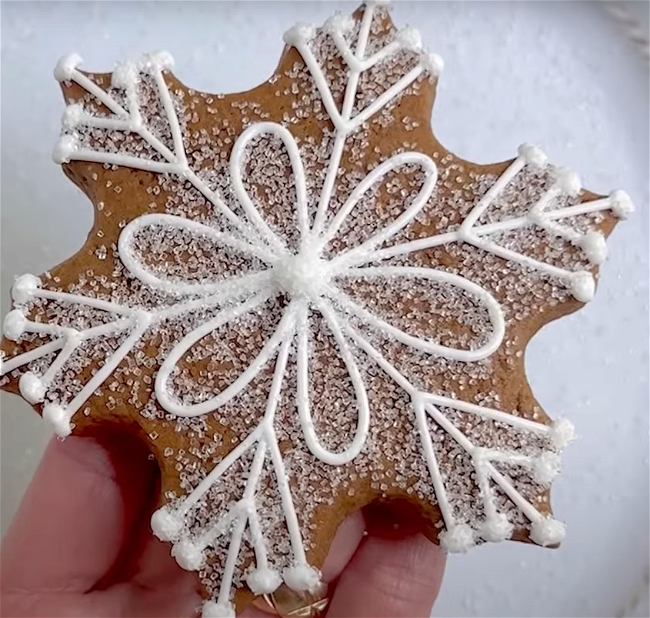
How to Decorate Gingerbread Snowflakes
How to Decorate Gingerbread Snowflakes
By using a classic gingerbread cookie recipe, these snowflake cookies offer a striking contrast to the white royal icing designs. This tutorial shows you how to create your own gingerbread snowflake designs, and you only need one color of icing! You'll also learn some tricks and tips along the way. This design is simple, but is a great way to practice new techniques and to explore your creative side.
- Print recipe
- Share on Twitter
- Share on Facebook
- Share on Pinterest

-
1 Tipless Piping Bag
-
Bright White Food Coloring
-
Sanding Sugar (if you don't have sanding sugar on hand, you can use granulated sugar)
-
1
Bake and cool cookies before decorating. Try Ann Clark's classic gingerbread cookie recipe. Make sure cookies are fully cooled. If they are warm, the icing will run off of them. Make royal icing.
-
2
Prepare the following icing colors:
Detail Consistency:
White -
3
When you begin piping, start your line just above the cookie to prevent bubbling and for clean lines with a consistent width. As you pipe, hover just above the cookie to get consistent lines. Starting at the 6 tips of the snowflake, draw straight lines, creating a star pattern in the center of the snowflake.
-
4
Create a V shape on either side of your lines, at the tips of your snowflake.
-
5
From the center of the snowflake, pipe loops in between the lines, almost like flower petals. Again, hovering your piping bag just over the cookie will ensure that your loops are consistent.
-
6
Add small dots at the end of each line for some added flair.
-
7
While the icing is still wet, gently sprinkle sanding sugar on the cookie to make it sparkle. If you don't have sanding sugar, granulated sugar will work. We recommend setting your cookie on a plate before sprinkling sugar on it to prevent making a mess.
Recipe Video
Cookies decorated by Laura Luk of Butterfly Bakes Cookie Decorating


